Complete Guide to Receiving Emails
Everything you need to know to get started with Recivo's programmatic mailbox service. From basic setup to advanced webhook integrations.
Getting Started
Welcome to Recivo! This guide will walk you through everything you need to know to start receiving emails programmatically. Whether you're building email-based workflows, AI agents, or notification systems, Recivo makes it simple.
Step 1
Create your account and organization
Step 2
Generate your first email address
Step 3
Set up webhooks or API polling
Dashboard Overview
The dashboard is the main interface for managing your email addresses and webhooks.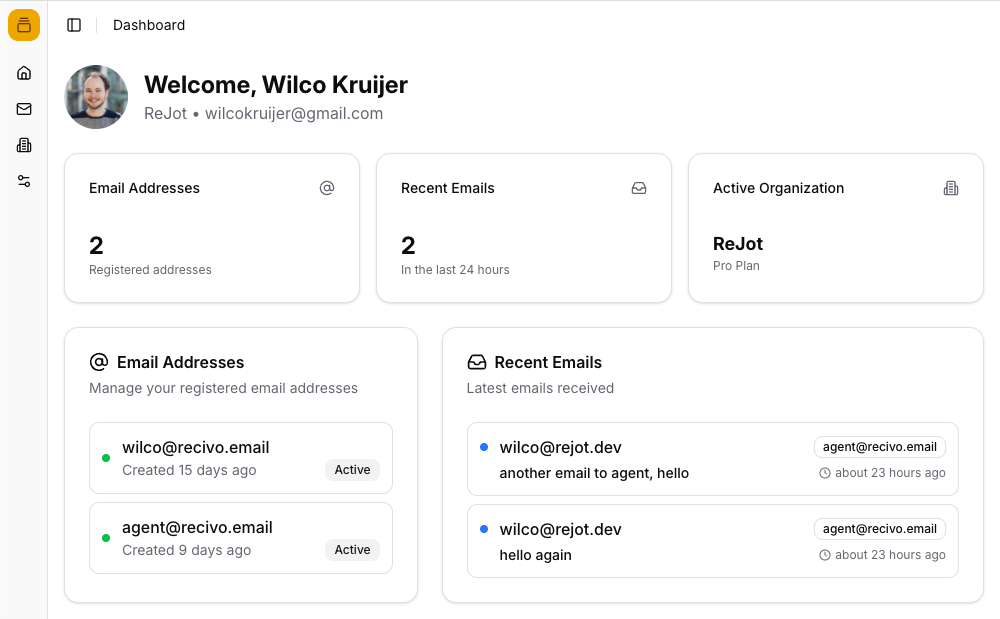
Creating Email Addresses
Email addresses in Recivo are unique identifiers that route incoming emails to your application. You can create as many as you need for different use cases.
Using the Dashboard
Using the side bar, go to the Email Addresses section. Click on the Create Email Address button to create a new email address.
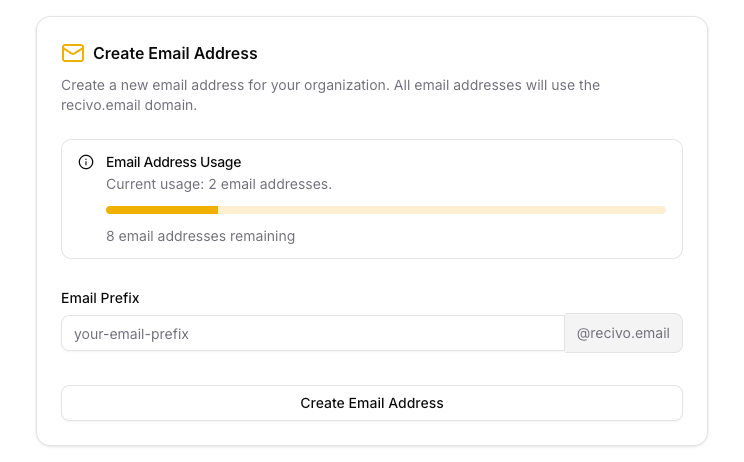
On a Free or Pro plan, you can only set the "local part" of the email address. The domain is always recivo.email. Custom domains and sub-domains are reserved for Enterprise plans.
💡 Pro Tip
Use descriptive local parts like "user-123", "support-ticket-456", or "ai-agent-789" to easily identify email purposes in your application.
Receiving Emails
Once your email addresses are set up, you can receive emails through webhooks or by polling our API. All emails include full content, headers, and attachments metadata. Attachment content is not included in the API response, but can be retrieved using the attachment URL.
Webhooks (Recommended)
Real-time notifications delivered instantly to your application when emails arrive.
- Instant delivery
- Secure signatures
- Automatic retries
API Polling
Query our API endpoints to fetch new emails on your schedule.
- Full control
- Simple integration
- Rate limited
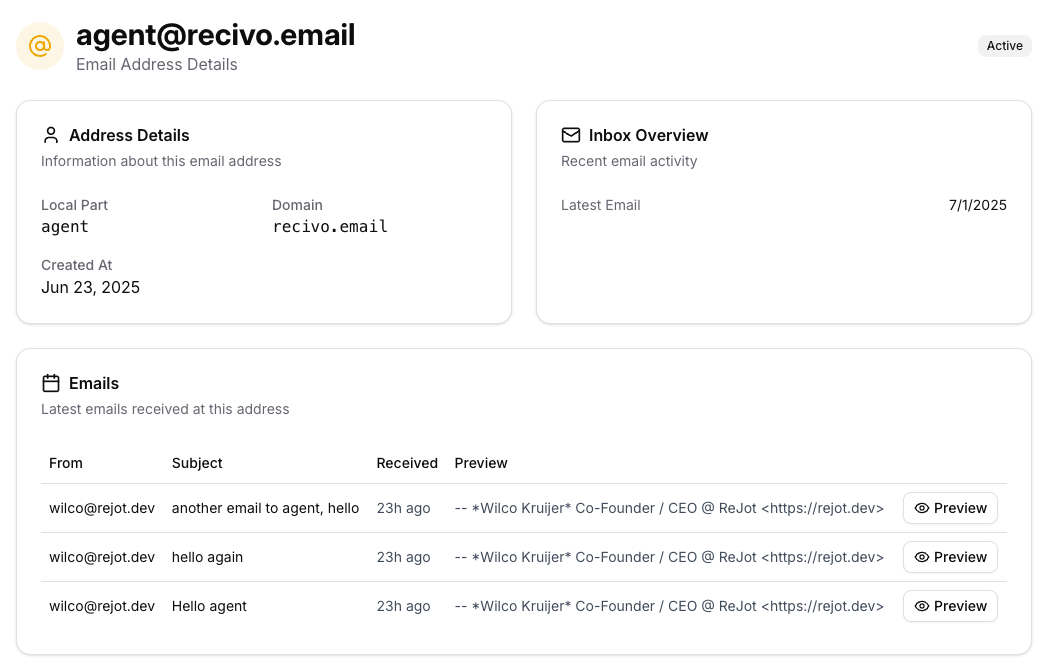
Using the Dashboard
Besides webhooks and API access, emails can also be viewed in the Inbox section of the dashboard.
API Usage
Our REST API provides full programmatic access to your email inboxes. Here are the most common operations you'll use.
Authentication
All API requests require an API key. API keys can be created in the API Keys section of the dashboard. Include it in the Authorization header:
Authorization: Bearer recv_abc
Retrieving the inbox
The inbox endpoint is the main way to retrieve emails from the inbox. The cursor query parameter can be used to paginate through the inbox, using this ULID. The ULID is a unique identifier for the email in the Recivo system.
[
  {
    "ulid": "01HZXYZ123456789ABCDEF",
    "messageId": "<abc123@example.com>",
    "subject": "Need help with API integration",
    "date": "2024-01-01T12:00:00.000Z",
    "to": "support@recivo.email",
    "from": "user@example.com",
    "html": "<html><body>Hi, I need help with API integration...</body></html>",
    "text": "Hi, I need help with API integration...",
    "createdAt": "2024-01-01T12:00:00.000Z",
    "addresses": [
      {
        "type": "to",
        "name": "Support Team",
        "address": "support@recivo.email"
      },
      {
        "type": "from",
        "name": "John Doe",
        "address": "user@example.com"
      }
    ],
    "headers": [
      {
        "name": "message-id",
        "value": "<abc123@example.com>"
      },
      {
        "name": "date",
        "value": "Wed, 01 Jan 2024 12:00:00 +0000"
      }
    ],
    "attachments": [
      {
        "filename": "screenshot.png",
        "mimeType": "image/png",
        "disposition": "attachment",
        "related": false,
        "contentId": "attachment-123",
        "fileSize": 1024000,
        "url": "/api/v1/organizations/your-org-id/attachments/attachment-123"
      }
    ]
  }
  // ... more emails ...
]
Download Attachments
Attachment data can be downloaded using the attachment URL. The inbox response contains the mime type of the attachment, which can be used to interpret the retrieved bytes.
// Download attachment
const attachmentResponse = await fetch(email.attachments[0].downloadUrl, {
  headers: {
    'Authorization': 'Bearer your-api-key'
  }
});

const attachmentBlob = await attachmentResponse.blob();
// Process the attachment...Webhooks Setup
Webhooks provide real-time notifications when emails arrive. They're the most efficient way to integrate Recivo into your application workflow. Webhook endpoints can be configured in the dashboard.
Webhook Details
Tags & Filtering
When configuring a webhook, you can set a tag to filter webhooks in your application or distinguish between environments (e.g. production and staging).
Versioning
Webhooks are versioned using a "version date". Currently the newest version is "2025-06-26". Breaking changes will not occur as long as the version date stays the same.
Security & Authenticity
Webhook authenticity is verified using HMAC-SHA256 signatures in the X-Webhook-Signature header. The secret can be found in your dashboard.
Delivery Guarantee
We use at-least-once delivery guarantee. Webhooks will always be delivered, but may occasionally be delivered multiple times in rare occurrences.
Automatic Retries
If there are connectivity issues, webhooks are automatically retried using exponential backoff. Notifications are sent in order, so one failure blocks subsequent deliveries. Initial delay is 2 minutes with up to 10 retries before automatic pausing.
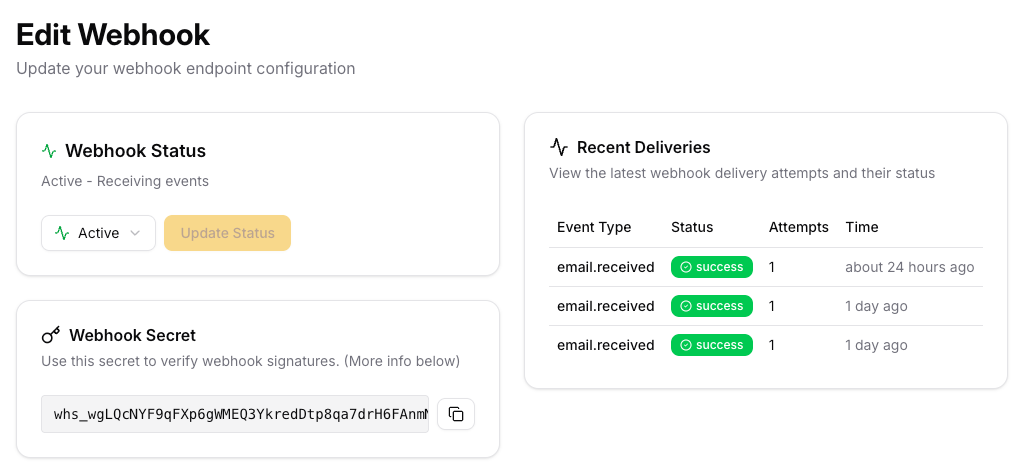
Managing Webhooks
In the Webhooks section of the dashboard you can manage your webhooks. You can create, edit, and delete webhooks. You can also view the webhook logs.
Webhook Payload
We purposefully keep the webhook payload simple. The payload is a JSON object that contains the ULID of the email that was received. With this ULID you can retrieve the email from the inbox API endpoint. The HTTP POST method is used to send the webhook. A response status code of 200 is required to acknowledge the webhook delivery.
{
  "webhookId": "01JZ0GVK6ZYV888GCKB06E0T7Q",
  "webhookEndpointId": "wh_HqxAaHRGVVm9Ae9Q6xFM8CYyFji8N",
  "eventType": "email.received",
  "versionDate": "2025-06-26",
  "tag": "my-arbitrary-tag",
  "timestamp": "2025-07-02T12:00:00.000Z",
  "data": {
    "ulid": "01JZ0GVK6ZYV888GCKB06E0T7Q"
  }
}
💡 What is a ULID?
ULID stands for Universally Unique Lexicographically Sortable Identifier. It's similar to a UUID but with key advantages: ULIDs are sortable by creation time, URL-safe, and more compact. In Recivo, each email gets a unique ULID that serves as its permanent identifier for API operations.
Verifying Webhook Signatures
For security, all webhooks are signed with HMAC-SHA256. You should always verify the signature before processing the webhook to ensure it's authentic and hasn't been tampered with.
How signature verification works:
- When we send a webhook, we calculate a HMAC-SHA256 signature of the request body using your webhook secret
- This signature is included in the
X-Webhook-Signatureheader - You should calculate the same signature on your end and compare it with the header value
- If they match, the webhook is authentic and hasn't been tampered with
Note: raw request body
The signature should be calculated based on the raw request body. In Express, when using BodyParser, the body is already parsed so the payload can be stringified to get the raw body. In more sensible frameworks, await req.text() can be used to get the raw body as text.
// Webhook signature verification and handling
async function verifyWebhookSignature(secret, payload, signature) {
  const encoder = new TextEncoder();
  const keyData = encoder.encode(secret);
  const payloadData = encoder.encode(payload);

  const key = await crypto.subtle.importKey(
    "raw",
    keyData,
    { name: "HMAC", hash: "SHA-256" },
    false,
    ["sign"]
  );

  const signatureBytes = await crypto.subtle.sign("HMAC", key, payloadData);
  const signatureHex = Array.from(new Uint8Array(signatureBytes))
    .map((b) => b.toString(16).padStart(2, "0"))
    .join("");

  return signature === signatureHex;
}

// Express middleware example
app.post('/webhook/email', async (req, res) => {
  const signature = req.headers['x-webhook-signature'];
  const payload = JSON.stringify(req.body);

  // Verify the signature
  const isValid = await verifyWebhookSignature(
    process.env.WEBHOOK_SECRET,
    payload,
    signature
  );

  if (!isValid) {
    return res.status(401).send('Invalid signature');
  }

  // Respond with success
  res.status(200).json({ received: true });
});
Ready to Start Building?
You now have everything you need to integrate Recivo into your application. Start receiving emails programmatically in just a few minutes.